BAFluidView


![]()
Overview
This view and its layer create a 2D fluid animation that can be used to simulate a filling effect.
Requirements
- iOS 8+ iPhone, iPad and iPod Touch devices
Example
To run the example project, clone the repo, and run pod install from the Example directory first.
Getting Started
Installation
BAFluidView is available through CocoaPods. To install it, simply add the following line to your Podfile:
pod "BAFluidView"
Simple Usage
Basic
To add a BAFluidView to your app, add the line:
BAFluidView *view = [[BAFluidView alloc] initWithFrame:self.view.frame];
[view fillTo:@1.0];
view.fillColor = [UIColor colorWithHex:0x397ebe];
[view startAnimation];
[parentView addSubview:view];
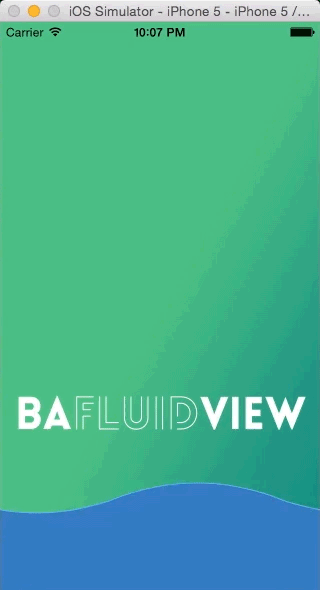
This creates the following view:
Advanced Usage
Listed below are examples of several properties that you can control.
Init
You can use initWithFrame:maxAmplitude:minAmplitude:amplitudeIncrement: to control how high/low you want the wave to go. The increment method helps control the variation between the peaks. If you’re only concerned is where the fluid starts, initWithFrame:(CGRect)aRect startElevation:(NSNumber*)aStartElevation creates a fluid view with default values, but lets you choose the starting elevation. To control all init values, use the method (id)initWithFrame:(CGRect)aRect maxAmplitude:(int)aMaxAmplitude minAmplitude:(int)aMinAmplitude amplitudeIncrement:(int)aAmplitudeIncrement startElevation:(NSNumber*)aStartElevation which is a combination of the two above.
Animate Only Once (End in old state)
If you only want the effect to fill only once (or any specific amount of times) you can edit the fillRepeatCount property:
BAFluidView *view = [[BAFluidView alloc] initWithFrame:self.view.frame maxAmplitude:40 minAmplitude:5 amplitudeIncrement:5];
view.fillRepeatCount = 1;
[view fillTo:@1.0];
view.fillColor = [UIColor colorWithHex:0x397ebe];
[view startAnimation];
[parentView addSubview:view];
Animate Only Once (End in new state)
You can also create the same effect as above, but stay in the filled state by editing the fillAutoReverse property:
BAFluidView *view = [[BAFluidView alloc] initWithFrame:self.view.frame maxAmplitude:40 minAmplitude:5 amplitudeIncrement:5];
view.fillColor = [UIColor colorWithHex:0x397ebe];
view.fillAutoReverse = NO;
view.fillRepeatCount = 1;
[view fillTo:@1.0];
[view startAnimation];
[parentView addSubview:view];
This creates the following view:
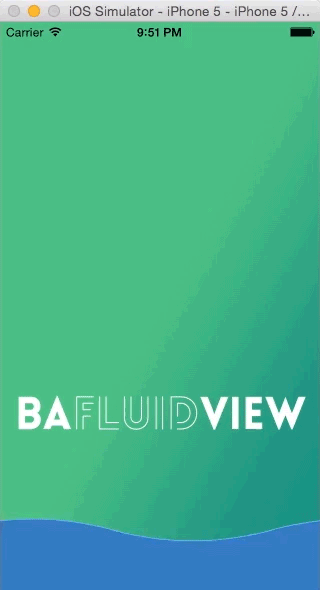
Fill to specific level
By default, the animation goes to the top of the view. If you don’t want it to go the entire distance, you can use the fillTo: method by giving it a percentage of the distance you want it to travel:
BAFluidView *view = [[BAFluidView alloc] initWithFrame:self.view.frame];
[view fillTo:@0.5];
view.fillColor = [UIColor colorWithHex:0x397ebe];
[view startAnimation];
[parentView addSubview:view];
This creates the following view:
Fill Duration
You can set the duration of a fill with the fillDuration property. The duration will be the amount of time it takes for the fill to go from 0% - 100%. Adding it to the example above, we get :
BAFluidView *view = [[BAFluidView alloc] initWithFrame:self.view.frame];
view.fillDuration = 5.0;
[view fillTo:@0.5];
view.fillColor = [UIColor colorWithHex:0x397ebe];
[view startAnimation];
[parentView addSubview:view];
Note: fillDuration needs to be set before you call fillTo: method!
This creates the following view:
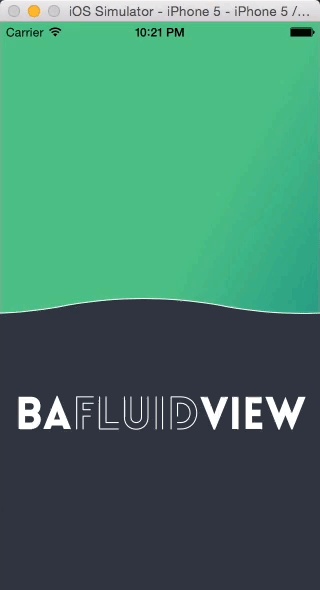
Fill Color
By editing the fillColor property, you can give the fluid any color:
BAFluidView *fluidView = [[BAFluidView alloc] initWithFrame:self.view.frame startElevation:@0.5];
fluidView.strokeColor = [UIColor whiteColor];
fluidView.fillColor = [UIColor colorWithHex:0x2e353d];
[fluidView keepStationary];
[fluidView startAnimation];
[parentView addSubview:view];
Note: keepStationary keeps the fluid at the starting level!
This creates the following view:
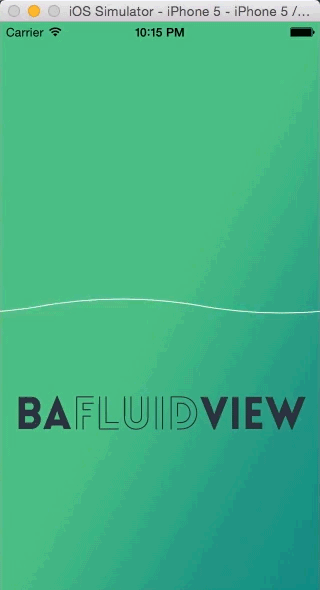
Stroke Color
Similiarly, you can alter the stroke property. With a clear fillColor you get a wave effect like below:
BAFluidView *fluidView = [[BAFluidView alloc] initWithFrame:self.view.frame startElevation:@0.5];
fluidView.fillColor = [UIColor clearColor];
fluidView.strokeColor = [UIColor whiteColor];
[fluidView keepStationary];
[fluidView startAnimation];
[parentView addSubview:view];
This creates the following view:
Use as a Layer
If you want to add the effect to another view, use its layer!
BAFluidView *fluidView = [[BAFluidView alloc] initWithFrame:self.view.frame startElevation:@0.3];
fluidView.fillColor = [UIColor colorWithHex:0x397ebe];
[fluidView fillTo:@0.9];
[fluidView startAnimation];

UIImage *maskingImage = [UIImage imageNamed:@"icon"];
CALayer *maskingLayer = [CALayer layer];
maskingLayer.frame = CGRectMake(CGRectGetMidX(fluidView.frame) - maskingImage.size.width/2, 70, maskingImage.size.width, maskingImage.size.height);
[maskingLayer setContents:(id)[maskingImage CGImage]];
[fluidView.layer setMask:maskingLayer];

[parentView addSubview:fluidView];
Sweet! check it out:
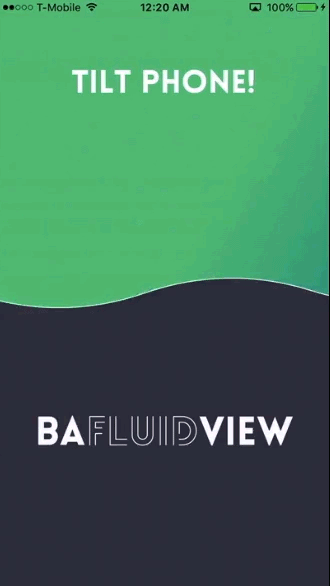
Adding Tilt Animation
The startTiltAnimation allows the BAFluidView to listen to a notification that can be broadcasted from a CMMotionManager instance. Apple recommends only having one CMMotionManager per application. You’ll have to instantiate your own and broadcast the kBAFluidViewCMMotionUpdate notification with the data object provided (for more information look at example case 4 in the demo). Once set up, you can add tilt animation in the following manner:
 BAFluidView *fluidView = [[BAFluidView alloc] initWithFrame:self.view.frame startElevation:@0.5];
[fluidView keepStationary]; //optional
[fluidView startAnimation];
[fluidView startTiltAnimation];
[parentView addSubview:fluidView];
This produces the following animation:
ChangeLog
Version 0.2.3 (6.21.2016)
- (BUG FIX) Wave crest animation didn’t started immediately (PR by @oscart)
Version 0.2.2 (5.19.2016)
- fixed startElevation variable name
- removed startElevation setter method since it’s a private var
- added unit testing with Specta/Expecta
- fixes travis CI so it runs unit tests on every push
Version 0.2.1 (3.21.2016)
- (BUG FIX) fixed amplitude array out of bounds bug (PR by @AndrewPetrov)
Version 0.2.0 (12.11.2015)
- added tilt functionality
Version 0.1.8 (11.30.2015)
- Code clean up
- fixed
fillToand shrinking/growing error
Version 0.1.7 (11.18.2015)
- (BUG FIX) Fixed memory leak for
getBezierPaths
Version 0.1.6 (07.23.2015)
- (BUG FIX) Fixed rotation bug
- Added speed option for fill
Version 0.1.5 (07.21.2015)
- Added Carthage support
Version 0.1.4 (07.14.2015)
- Expose
minAmplitude,maxAmplitude, andamplitudeIncrement - (BUG FIX) Fix background glitch [Issue 14] (PR by @andreamazz)
Version 0.1.3 (07.09.2015)
- Improved README syntax (PR by @andreamazz)
- Updated demo [Issue 15]
colorWithHexnow a category ofUIColor(PR by @stonesam92)
Version 0.1.2 (07.08.2015)
- Added missing headers
- Added new init methods, elevation feature, and updated fillTo
- updated timer function for swipe label
- added ability to change line width
- updated demo (example 1 and 6)
Version 0.1.1 (03.31.2015)
- Updated Demo
Version 0.1.0 (12.11.2015)
- Initial release
Further informations
- N/A
Known issues
- Demo for the masking example misaligns on device orientation change.
Author
Bryan Antigua, antigua.B@gmail.com - bryanantigua.com
License
BAFluidView is available under the MIT license. See the LICENSE file for more info.